
One of the great things about English paper piecing is being able to match a variety of different shapes together - just like a jigsaw, to create endless possibilities for design. So that's what we're going to focus on today, and the best way to do that is grab a bunch of EPP shapes and have a play around!
This is a design I've been working on recently. I'm calling it the #HexagonSpiralQuilt! It's a really fun design which finishes up in a completed hexagon shape so you can easily create multiple blocks and fit together ;-) This block uses 2" hexagons, 2" equilateral triangles and 2" 6-pointed diamonds.

I won't go into detail of what shapes match what, as I discovered the Paper Pieces website have already done all the hard work! You can find the table here. Instead I thought I would share with you a few pattern ideas for you to try.


One of the questions I was asked at the beginning of this series was how to deal with tight corners and 'inset seams'. I think I best explained the technical side in this post using diamonds, which follows the same principles. If you struggle with them my best advise is to practice, practice, practice! and try to plan out your route of sewing before diving straight in realising you've left yourself with some tricky inset seams which sometimes can sometimes be avoided. For example, take my Seven Sisters epp project I'm working on. This may look like I had some very deep seams to meet ...

… in fact it was quite simple to piece. I joined my stars just as you see in this picture below.

Though the fun thing about EPP is there are no 'rules' for sewing sequence, unlike regular machine piecing where blocks are made in stages and a predetermined sequence. So there is no wrong way to sew your designs together!
TIP: A general rule is to remove the paper piece templates as soon as that piece is surrounded by sewn units on all sides. This allows you to manipulate the block easier when you are adding more shapes. Though there's no harm in leaving them in while you work, if you have enough papers!
How to remove the papers? Easy. Press your block so it's nice and flat to help set everything in place. Turn your block over and pop the papers out with the edge of your finger - nails are great for this! Using the Sewline glue pen can sometimes be a little trickier to remove the paper, so make sure your block is pressed well to keep their shape. If you punch holes in your paper templates, as I recommended on this post you can just pull out the papers with a crochet hook or tweezers! If they're a real nightmare to remove, you may have used too much glue.
If you're careful when you remove them, you can definitely re-use your shapes again and again. I like to give mine a quick press to iron out the creases and put them under a heavy book to stop them curving from the heat of the iron.
The Lucy Boston Patchwork Of The Crosses quilt is a fantastic design which has become popular to make again in recent years. I know this because lots of my Sew and Quilt customer's are making it! :-) It's got some tight corner's to meander so it's not the easiest of EPP designs, but oh so beautiful! You can make up the entire design in 1" honeycombs and 1" squares. If you don't have the book, I found this free tutorial for the Patchwork Of The Crosses quilt, with diagrams for the 3 basic blocks that make up the quilt and full instructions! Below, is a simple sewing sequence guide on completing the main block for the quilt. The method of joining the pieces allows for lots of continuous stitching. This way you won't have to break threads and start from a new section so often, which will speed up the joining process.

Of course, I forgot to photograph the initial stages of putting the centre piece together, so hopefully the diagram with the sewing sequence in numerical order will help. (1) Sew the centre pieces in pairs, and (2) join together to form the X shape (just like we did with the diamonds to make a star shape here). (3) Add the corners, sewing them in a right angle.

Sew the next 4 pairs together, and join to the main section.


Repeat and sew the final 4 pairs together and join to the block.

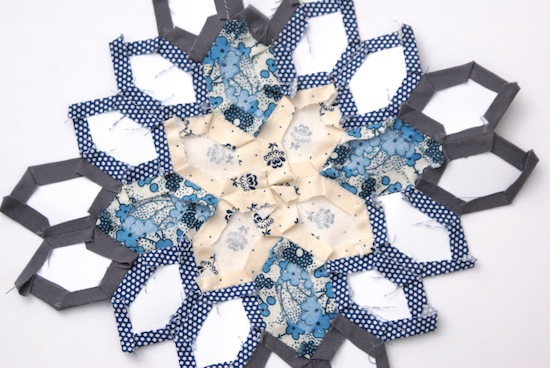
You may also find that row by row assembly is a more practical to piece. It's a speedy route if you are doing tessellation design. Such as this hexagon flower which will be set on a plain background.

I hope this guide has helped you, and perhaps inspired you! Next week - on time! ;-) We'll be covering curves. See you then!
Oh wow, how pretty is your work, I am addicted to hexies, and I love EPP.
ReplyDeleteIt is really useful to see some ideas made up, and also different orders to try stitching them in too. Hexagons are still my favourite, I really don't like working with tiny points such as the end of stars, I struggle with the excess fabric.
ReplyDeleteThis series is so useful, as I am not a fan of EPP at all but the City & Guilds course I'm about to start has it as the first subject. I just finished a baby quilt with hexagon flowers but I machine pieced it all and there were only hexagon shapes in it! I'm handing it to the mother today - so excited! Your posts are very clear with great designs, hints and tips. Thanks so much
ReplyDeleteFantastic post! I've struggled to find instructions on the sequencing of pieced blocks so thanks for this :) Patchwork of the Crosses is on my 'one day list'.
ReplyDeletelove that birdie fabric in the last one !!!
ReplyDeleteThanks again for such an informative post - love the different selections of fabrics!
ReplyDeleteGreat post! I am completely addicted to EPP
ReplyDelete