
Applique
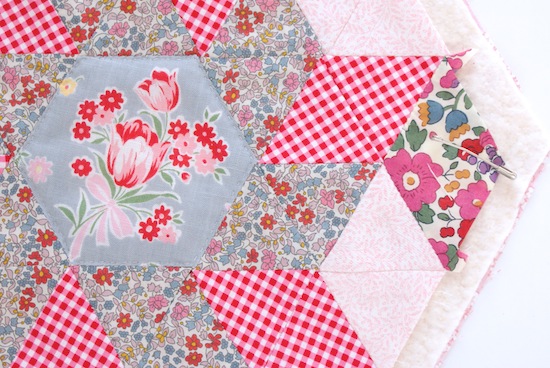
The easiest way to finish your EPP quilt top, while maintaining the uneven edges is to appliqué your top to borders - as seen in the hexagon example below. Decide on your border width size and allow a slightly longer length so you can miter the corners. Appliqué the quilt top to all four sides so you can then baste and finish your quilt as you would a straight edge quilt.

Image: Vintage 30s Flower Garden Quilt, Ebay
With the diamond EPP quilt I'm currently working on, I am in the process of appliquéing each finished star to a square backing fabric - I will then machine sew all the blocks together and finish as I would a regular quilt top.


Binding
Another method of finishing is to use a matching binding. Here's a helpful tutorial on how to tackle odd shaped corners, which would apply when trying to negotiate those hexagon edges.

Image: 30/40s Grandmothers Flower Garden Quilt, Ebay
Facing
For my favourite shape; the diamond, the binding method wouldn't be a good finishing technique because the points would be covered which could compromise the design. So for the project below using triangles and diamonds I have used an EPP facing technique to create a matching border to the back of the quilt, here's how I did it!

Cut the backing fabric and batting slightly larger than the finished design, baste and quilt as desired.
With your chosen fabric, create a matching border shape; baste EPP shapes and sew together to form a ring border.

TIP: If you haven't quilted right up to the edges of the quilt keep the papers in as long as possible to make it easier to whipstitch the shapes together.

TIP: Pay special attention to the corners of the the quilt, take 3 or even 4 stitches to make sure your corner's are well covered.

Trim off the excess.

Press the border facing well, making sure all seam edges are nice and neat. Now pop the papers out, taking care not to pull too heavily to put strain on the stitches.

Un-fold the border facing to the back of the quilt. You should start to see your finished EPP quilt take shape!

Use a knitting needle to poke the corners, (this is why it was important to take extra care sewing the corners).

Slip-stitch the the border facing to the back of the quilt. Fold over the 'dog-tails' (diamond points) underneath as you sew.


Finished!! Perfect and neat! and all those points are still showing nicely. You can also use this method of finishing for hexagon quilts just as well. In fact, a half hexagon shaped border facing would be lovely for a large grandmothers flower garden quilt as it would leave a nice straight edge to the back.
And of course, a very simple way of finishing your quilt with an uneven edge is to baste and quilt as normal. Then trim the backing fabric down to about 1/4" larger than the finished quilt top and trim the batting down 1/4" smaller than the finished quilt top, following along the uneven quilt top shape. Turn the backing fabric under to line up with the shape of the quilt top and slipstitch closed.
I hope this has given you some helpful information on how to complete your EPP quilts! and congratulations on getting to this level with your project it always seems far in the distance when you are making up hexagon flowers or whatever design you're working on! Thank you for joining me on the EPP Basics series, I had wanted to talk about a couple more topics but time has not allowed me with our impending nuptials next month! >.< perhaps I'll delve into some other EPP areas once I've got that out the way ;-)
Here's a recap on what we've covered on the series;
Week 1 // History of EPP + Supplies
Week 2 continued // Joining Shapes + Grandmothers Flower Garden Tutorial
Week 3 // Diamonds + Star Tutorial
Week 4 // Fussy Cutting Tutorial Week 5 // Matching Shapes + Pattern Ideas
Week 6 // Curves + Clamshell Tutorial
Oh, look at that! Your finishing technique is very clever.... and pretty!
ReplyDeleteWhat a neat trick! Thanks for sharing.
ReplyDeleteGreat tutorial. I do have a question though. When you have appliquéd your large quilt design on to the backing fabric do you leave your backing fabric all intact or do you cut away the middle to make it less bulky?
ReplyDeleteThanks so much for a great series, have really enjoyed it!
ReplyDeleteDo you know the name of the quilt design that you finished in this post?
ReplyDelete